Inspection Gauge Ball
Product description
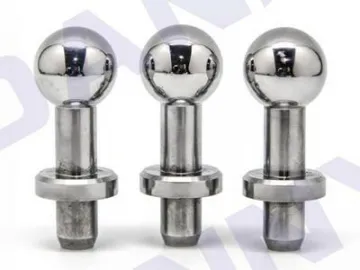
Inspection gauge ball is a common ball tool that used to locating and aligning. After quenching treatment, the hardness of the ball made of stainless steel 440-C can reach Rc58-60. The degree of eccentricity tolerance is no more than 0.005mm. We can provide you customized products to meet your needs.
Characteristics
The gauge ball has high hardness because of 440-C stainless steel material. The gauge ball has high wear resistance owing to the hardening processing. Cooperated with coordinate measuring machine, the gauge ball can be the reference point when testing. The gauge ball has high accuracy with the degree of eccentricity of less than 0.0001 inch.
Types
| Parts Number | A | B | C | D | Thread E | Diameter F | Net WEIGHT (pound) /10 |
| 10180 | 0.2500 | 0.1247 | 0.2000 | 0.58 | 1/4 | 1 | |
| 10181 | 0.3750 | 0.1872 | 0.3000 | 0.75 | 3/8 | 1 | |
| 10182 | 0.3750 | 0.3125 | 0.3000 | 0.74 | 8-32 | 1/2 | 3 |
| 10183 | 0.5000 | 0.2497 | 0.3125 | 0.63 | 6-32 | 1/2 | 3 |
| 10184 | 0.5000 | 0.2497 | 0.4000 | 0.93 | 6-32 | 1/2 | 3 |
| 10185 | 0.5000 | 0.2497 | 0.5000 | 0.88 | 6-32 | 1/2 | 3 |
| 10186 | 0.5000 | 0.3750 | 0.3750 | 1.31 | 10-24 | 5/8 | 6 |
| 10187 | 0.6250 | 0.3122 | 0.4500 | 1.08 | 8-32 | 5/8 | 6 |
| 10188 | 0.6250 | 0.3750 | 0.4500 | 1.42 | 10-24 | 5/8 | 7 |
| 10189 | 0.6250 | 0.3750 | 0.5000 | 1.47 | 10-24 | 3/4 | 9 |
| 10190 | 0.7500 | 0.3750 | 0.5625 | 1.53 | 10-24 | 3/4 | 1.3 |
| 10191 | 1.0000 | 0.5000 | 0.7000 | 1.64 | 10-24 | 1 | 2.5 |
Notes: All inspection gauge balls can be customized according to your special requirements.
CNC processing application
The special-shaped car LED mold part only has a calibration table in the bottom of the part, and there are no datum point, that is to say, no standard tool is set to relocate the part.
First the forming face need to be machined roughly and the mounting slots and holes of the inspection gauge bal1 will be processed fine machining. And then we need to rough and fine machining the bevels surrounding the part. Finally, we need to process fine machining for the forming surface, in this time, the inspection gauge ball will be used to be the datum point for the part machining.
Then this part and similar products need to be modified by the inspection gauge ball to ensure it is mounted rightly.
EDM processing application
This is a core of the car mold which will need to be EDM processed. For this kind of irregular parts, it is only easy to process correctly and accurately when we use the inspection gauge ball. It will be a big challenge for us to finish EDM processing without the inspection gauge ball.
Deep hole drill processing application
In order to have good cooling effect, the coolant hole will be designed to keep a distance with the forming surface in the designing of car mold. The coolant holes of car molds are always inclined because of the distance between the hole and forming face. The mold will be easy to be damaged if the distance is too small, but the cooling effect will be decreased if the distance is too large. It is difficult to make coordinates on the inclined surface. So it is a challenge to processing the inclined coolant holes on the ordinary three-axis deep hole drill. We adopt inspection gauge ball to position when the coolant holes are machining by the deep drill to increase the efficiency and accuracy.
Scan QR to Read
Links:https://www.globefindpro.com/products/27428.html
Links:https://www.globefindpro.com/products/27428.html
Recommended Products
-
 Gauge Block Set
-
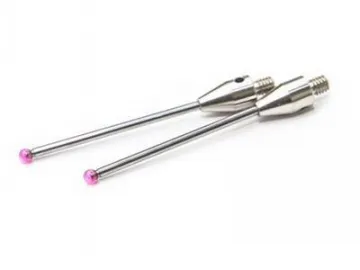 Ruby Ball Precision Stylus
-
 Precision Shaft Pin
-
 Miniature Ball Bearing Guide Sets
-
 Mold Slide Wear Plates
-
 Precision Piston Pin
-
 Magnetic Transmission Drive Roller
-
 SMD 3020 Strip LED Light
-
 SMD 3528 Flexible LED Light
-
 CNC Machining Automotive Shock Absorber, Suspension Parts
-
 Flexible Strip 3014 SMD LED Light
-
 Laser Marking Manufacturing Service
Hot Products
