898_2E
Mechanical properties of fasteners -Part 2:
Nuts with specified proof load values - Coarse thread
Fsreword
ISO (the International Organization for Standardization) is a worldwide federation of national Standards bodies (ISO metnber bodies). The work of preparing International Standards is normally carried out through ISO technical committee. Each member body interested in a subject: for which a technical commitlee has been established has the right to be represented on that cotnmittee. International organizations, governmental and non-govetnmental, in liaison with ISO, also take part in the work. lS0 cotlaborates closely with the International Electrotechnical Commission (IEC) on all mattetrs of electrotechnical standardization.Draft lntetrnational Standards adapted by the technical committees are circutated to the member bodies for voting. Publication as an international Standard r-equires approval by at least 75﹪of the member bodies casting a vole.
International Standard ISO 898-2 was prepared by Technical Committee ISO/TC 2, Fasteners, Sub-Committee SC 1, Mechanical properfies of fasfeners.
This second edition cancels and replaces the fitst edition (ISO 898-2:1980), which has been technically revised.
ISO 898 consists of ,the following parts, under the general title Mechanical properties of fasfeners:
Part 1: Bolts, screws and studs
Part 2; Nuts wifh specified proof Load values -- Coarse fhread
- Part 5: Set screws and similar threaded fasteners not under tensile stresses
- Part 6: Abts with specilred proof Load vahes - Fine pifch thread
- Part 7: Torsional test and minimum torques for bolts and screws with nominal diameters I mm to 10 mm
Annexes A and B of this part of ISO 898 are for information only.
ISO 1992
All rights reserved. No part of this publication may be reproduced or utilized in any form or by any means, electronic or mechanical, including photocopying and microfilm, without permission in writing from the publisher.
Internalional Organization for Standardization
Case Postale 56 * CH-1211 Genkve 20* Switzerland
Printed in Switzerland
MechanicaI properties of fasteners -Part 2:
NUtS with specified proof load values - Coarse thread
1.Scope
This international Standard specifies the mechanical properties of nuts with specified proof Load values when tested at room temperature (sce ISO 1). Properties will vary at higher and lower temperature.
It applies to nuts
-with nominal thread diameters up to and incIuding 39 mm;- of trianguIar ISO thread and with diameters and pitches according . to ISO 68 and ISO 262 (coarse thread);
-- with diameter/pitch combinations according to ISO 261 (coarse thread);
--- with thread tolerances 6H according to ISO 965-1 and ISO 965-2;
-- with specific mechanical requirements;
_ with widths across flats as specified in ISO 272 or equivalenl;
- with nominal heights greater than or equal to 0.5ly
- made of carbon steel or low alloy steel.
It does not apply to nuts requiring special properties such as
-- lockirig abilities (see ISO 2320)
--- weldability;
--- corrosion resistance (see ISO 3506);
- ability to withstand temperatures a bove 300℃ or below - 50℃.
NOTES
1. Nuts made from free-cutting steel should not be used above 250 “C.
2 .For special products such as nuts for high-strength structural bolting, and overtapped nuts for use with hotdipped galvanized bolts, see the product Standards for appropriate values.
3 For assemblies with threads having tolerances wider than 6H/6g, there is an increased risk of stripping; see also table 1.
4 In the case of thread tolerances other or larger than 6H, a decrease of the stripping strength should be considered (see table 1).
Table 1 - Reduction in thread strength
D is the nominal diameter of the internal thread in accordance with ISO 724.
2. Normative references
The foIlowing Standards contain provisions which, through reference in this text, constitute provisions of this part at ISO 898, At the tirne of publication, the editions indicated were valid. All Standards are subject to revision, and Parties to agreements based on this part of 1SO 898 are encouraged to investigate the possibility of applying the most recent editions of the Standards indicated below. Members of IEC and ISO maintain registers of currently valid International Standards.
ISO 1:1975, Siandard refereuce iemperafure for industrial length measurernents.
ISO 68:1973, ISO general purpose screw threads -Basic Profile.
ISO 261:1973, ISO general purpose metric screw threads-General plan.
ISO 262:1973, ISO general purpose metric screw threads -- Selected sizes for screws,bolts and nuts.
1SO 272:1982, Fasteners –Hexagon products –widths across flats.
ISO 286-2:1988, ISO System of Limits and fits -Part 2: Tables of Standard tolerance grades and limit deviations for holes and shafts. ’
ISO 724:1978, ISO metric screw threads - Basic dimensions.
ISO 965-1:1980, ISO general purpose metric screw threads -- Tolerances --- Part 1; Principles and basic data.
1SO 965-2:1980, ISO general purpose metric screw threads ---. Tolerances - Part 2: Limits of sizes for general purpose bolt and nut threads – Mediun quality.
ISO 4964: 1984, Steel -- Hardness conversions.
ISO 6157-2:--- l) , Fasteners --- Surface discontinuities - Part 2 Nuts with threads MI5 to M39.
ISO 6506: 1981, Mefallic rnaterials - Hardrjess test- Brinell test.
SO 6507-1: 1982, Metallic materials ---- Hardness test - Vickers test -- Part 1: HV 5 to HV 100.
ISO 6508:1986, Metallic materials -- Hardness test --Rockwell test (scales A - B - C - D - E - F - G - H -K)
3 Designation System
3.1 Nuts with nominal heights≥ 0,8L/(effective lengths of thread ≥ 0,6L))
Nuts with nominal heights s≥ 0,8L (effective lengths of thread ≥ 0,6L) are designated by a number to indicate the maximum appropriate property class of bolts with which they may be mated.
Failure of threaded fasteners due to over-tightening can occur by bolt shank fracture or by stripping of the threads of the nut and/or bolt. Shank fracture is sudden and therefore easily noticed. Stripping is gradual and therefore difficult to detect and this introduces the danger of partly failed fasteners being left in assemblies.
lt would therefore be desirable to design thr-eaded connections so that their mode of failure would always be by shank fracture but, unfortunateIy, be-Cause of the many variables which govern stripping,strength (nut and bolt mate ! r,trzngths, thread clearances, across-flats dimensions, etc.), 11u ts would have to be objectionably thick to guarantee this mode in atl cases.
A bolt or screw of thread M5 to M39 assembled with a nut of the appropriate propet-ty class, in accordancc with tabte 2, is intended to provide an assembly capable of beirigg tightened to the holt proof load without thread stripping occurring.
However, should tiqhtening beyond bolt proof load take place, the nut‘design is intended to ensure at least IO % of the over-tiqhtened asscmblies fail through bolt breakage in Order to warn the User that the installation practice is not appropriate.
NOTE 5 For more detailed information on the strength of screw thrcad assemblies, see annex A.
1) 7-o be published.
Table 2- Designation System for nuts with nominal heights > 0,811
3.2 Nuts with ncxr~inal heights > 0,511 hut < 0,811 (effective heights of thread > 0,W but< 0,611)
Nuts with nominal heiqhts 2 0,51) but c 0,811 (effective height of thread 5 0,4D but c 0,6/1) are designated by a combination of two numbers: the second itrdicalcs the nominal stress under proof load on a hardened test mandrei, while the fit-st inclicates that the loadability of a bolt-nut assembly is reduced in comparison with the loadability on a hardened test mandrel and also in cotnparison with a bolt-nut assembly described in 3.1. The effective loading capacity is not only detcrmincd by the hardness of the nut and the effective height of thread but also by the tensile strength of the holt with which the nut is assembled. Table 3 gives the designation System and the Stresses under proof Ioad of the nuts. Proof loads arc shown in table 6. A guide fot- minimum expected stripping strengths of the joints when these nuts arc assembled wif.h bolts of vat-ious property classes is shown in table 7.
Table 3 - Designation System and Stresses under proof load for nuts with nominal heights 2 0,5D but< 0,8D
4.Materials
Nuts shall be made of steel conforming to the Chemical composition limits specified in table 4.
Table 4 - Limits of Chemical composition
Nuts of property classes 05, 8 (style 1 above M16),10 and 12 shall be hardened and tempered.
5. Mechanical properties
When tested by the methods described in clause 8, ihe nuts shall have the mechanical properties set out in table 5.
Table 5 - Mechanical properties
6. Proof load value
Table 6 - Proof Load values - Coarse thread
7 Failure loads for nuts with nominal height > 0,50 but < 0,8D
The vaiues of failure loads given in table 7 for guidante apply to different bolt classes. Bott stripping is the expected failure mode for lower strenqth bolts, while nut stripping tan be expected for’ bolts of higher property classes.
Table 7 - Minimum bolt stress when stripping occurs
8 Test methods
8.1 Proof load test
The proof load test shall be used wherever the capacity of available testing equipment permits, and shall be the referee method for sizes > M5.
The nut shall be assembled on a hardened and threaded tesl mandrel as shown in figures 1 and 2. For referee purposes, the axial tensile test is decisive.
The proof load shall be applied against the nut in an axial direction, and shall be held for 15 s. The nut shall resist the load without failure by stripping or rupture, and shall be removable by the fingers after the load is released. lf the thread of the mandrel is damaged during the test, the test should be discarded.
(lt may be necessary to use a manual wrench to Start the nut in motion. Such wrenching is permissible provided that it is restricted to one half turn and that the nut is then removable by the fingers.)
The hardness of the test mandrel shall be 45 tiRC minimum-
Mandrels used shall be threaded to tolerante class 5h6g except that the tolerante of the major diameter shall be the last quarter- of the Gg range on the minimum material side.
Dll is takon from tSO~2.
Figure 1 - Axial tensile test
Figure 2 - Axial compressive test
8.2 Hardness test
For t-outine inspection, hardness tests shall be carried out on one bearing surface of the nut and the hardness shall be taken as the mean of three values spaced 121Y apart. In case of dispute, the hardness tests shali be carried out on a longitudinal section through the nut axis and with impressions placed as close as possible to the nominal major diameter of the nut thread.The Vickers hardness test is the referee test, and where practicabte a Load of HV 30 shall be applied.
if Brineil and Rockweil hardness tests at-e appiied, the conversion tables in accordance with ISO 4964
shall be used.
The Vickers hardness test shall be Garried out in accordance wi1.h the requirements of ISO 6507-1.
The Brinell hardness test shall be carried out in accot-dance with the rcquit-ements of ISO 6506.
The RockweIt hardness test shall be carried out in accordance with the requirernents of ISO 6508.
8.3 Surface integrity test
For the surface integrity test, see ISO 6157-2.
9 Marking
9.1 Symbols
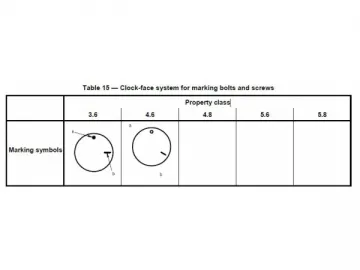
Marking sytnbols are shown in tables 8 and 9.
9.2 ldentification
Hexagon nuts of threads > M5 and all property classes shall be marked in accordance with the designation System described in clause 3, by indenting on the side or bearing surface, or by embossing on the chamfer. See figures 3 and 4. Embossed marks shall not protrude beyond the bearing surface of the nut.
Figure 3 - Exampies of marking with designation Symbol
Figure 4 - Examples of marking with code Symbol (clock-face System)
Table 8 - Marking symbols for nuts with property classes in accordance with 3.1
Tabie 9 - iWarking for nuts with properQ classes in accordance with 3.2
9.3 Marking of left-hand thread
Nuts with ieft-hand thread shall be marked as shown in figure 5 on one beat-ing surface of the nut by indenting.
Figure 5 - Left-band thread marking
Marking is reguired for nuts with threads > M5.
The alternslive marking for Iefl-hand thread shown in figure6 may also he used.
1) s = width across fjats.
Figure 6 - Alternative left-hand thread marking
9.4Alternative Marking
Alternative or optional permittcd marking as stated in 9.1 to 9.3 is left to the choice of the manufacturer
9.5 Trade (identification) marking
The trade (identification) marking of the manufacturer is mandatory on all products covered by the obligatory marking requirements for property classes, provided this is possible for technical reasons. Packages, however, shall be marked in all cases.
Annex A
(informative)
Loadabiiity of boltkd connections
(Explanatory note concerning the specifications of Technical Committee ISO/TC 2 reaardina nut strength and nut design-)
Following the introduction of the ISO Recommendation on property classes for bolts and screws (lSO/R 898~1:1968), an ISO Recommendation on property classes for nuts (ISO/R 898-2) was published in 1969. These ISO Recommendations together produced a new System for the property classes of bolts, screws and nuts, and, in conjunction with new rnarking requit-ements, provided a clear Statement of the loadability of a bolt-nut assetnbly.
a) In the case of bolts and screws, the symbol indicates:
minirnum tcnsile strengt.h and yield to ultimate stress ratio.
EXAMPLE
Property class 8.8
First figure (“8” in 8.8) = l/lOO of the mininium tensile strength, in newtons per
Square millimetre.
Second figure (If8” in 8.8) = ‘IO times the yield stress ratio (0,8).
Multiplication of these two figures (8 x 8 = 64), == l/lO of the minimurn yield stress, in newtons per Square millimetre.
b) In the case of nuts:
designation number = l/lOO of the minimum tensile strength, in newtons per Square miiiimelre, of a bolt and screw, which, when rnated with the nut, tan be loaded up to the minimum yield stress.
EXAMPLE
Roll or screw 8.8 - nut 8
connection loadablc up to minimum yield stress of the holt or screw.
Following publication of both ISO Recommendations, this System of property classes has been introduced worldwide and has proved to be a success.
In 1973 the Sub-Comtnittee SC 1 of lSO/TC 2 commenced revision of the BO Recommendations on the basis of experience gathered and also planned to convert both Recommendations into ISO Standards. In 1974, a draft lSO/DlS 898-1 on property classes for bolts and screws was pubiished, incorporating certain modifications and Supplements. which, however, did not Change the System of the property classes in principle. This draf? was then revised once more. A second draft was prepared in 1977 and has since been adopted by a Iarge majority of the member bodies of ISO. While considerable effort was required to develop thoroughly this draft concerning property classes for bolts and screws, it was finally resolved to %; Z s;aZisiaction of the interested countries within Sub-Committee SC 1 of iSO/TC 2 and now is aqreed to by ISO. More extensive by far, and touching the substance of the specifications, was the work on a revised Version of the ISO Recommendation ISO/R 898-2 and its conversion into an ISO Standard on property classes for nuts.
Experience had shown that, while the concept of property classes in conjunction with a norninaI 0,81.) nut height is simple and straightforward, certain practical difficuities arise. First, it is sometimes difficult or impossible to achieve specified nut properlies with the most econornical materials and methods, for example with fine threads and certain sizes of coarse threads. Secondly, compliance with the requirernents does not necessarily provide the assurance that the assembly would resist thread stripping during tightening. Previously it was considered adequate if the nut proof load was designed equal to the holt minimum ultirnate strength, however, the advent of yield Point tightening methods and improved understanding of the interaction between nut and bolt threads showed the nuts required re-design to provide greater resistance to stripping of both the internai and extemal threads.
For exampie, consider that Ihe effective tensile strength of a holt of class 8.8 rnay be belween 800 N/mm2 and about 965 N/mrn’ (determined froni the maximum hardness) in sizes up to M16. Consequently the yicld stress may range between 640 N / m m * and 772 N/mnI* for a vield to ultimate stress ratio of 80 9/0. With the uie of yield point tighteninq it will be Seen that the tightening stress approaches Zhe proof stress. Recent research has, in addition, shown tlIat a nut tested with a hardened mandreI is capable of susfaining a higher ioad before strippitIg than when tested with a boit of the appropriate property ctass. For exampie, a property class 8 nut when tesled with a mandrel of 45 HRC will be capable of approxirnately IO o/o higher load than when lested with a properiy ctass 8.8 bolt of dimensions simitar 10 the mandrel. Therefore. a nut that just meets a proof stress of 800 N/mn? with a hardened mandret might only be expected t.o sustain a load of approxirnately 720 N/mm* when mated with a property class 8.8 holt of minimum dimensions. it will be when be Seen that striping of the tracads may occur when tightening to stresses in excess of this,and frorn the boit rnechanicai pro pert ies it will be seen that this could he a frequent acc u t-ren ce with yieid point tightening. lt might be aryued, however, thal: under torque tension toading the tensile strengtlI of the holt is reduced by about 15 %G, bu1 it shoutd also be realized that the stripping . strenylhI of the assembly is also reduced by almost the Same amount under tot-q ue te nsion loading. In addition to t.he infroduc tian of yield Point tighfening mettIods, changes in certain ISO Standards were under consideration that would also adversely affect ttiis stripping tendency. Upgrading of bolt and screw mechanical properlies was pt-oposed as shown in iabie A.? (which is an excerpt from ISO 898-l), the pur-pose of which was to utilize futly the availabte strength of the commonly used materiats for grades 4.8, 5.8, 8.8 (above M16), 10.9 and 12.9.
Another proposed Change u nder consideration at this time was to reduce the width across flats of certain sizes of hexagon products to provide economies through optimized materiat use. As a resutt of these and other factors, certain mernber countries (Canada, Germany, NettIertands, Sweden, UK, USA) of Sub-Cornmittee SC 1 of tSO/TC 2 conducted research and extensive testing of nut-bott assen-ibties. Tests inciuded a full variety of product sizes,strength levels and materials. In general, tests were conducted on typical production fasteners utiiizing Standard matet-ials. Test Parts were accurately measured for dimensions and material stt-ength which then aiiowed appropriate statisticai inferpretation of the data. Results of the various invesfigaiors were evaluated by Canada a n d fo u n d to corre t ate Welt. A y eneral series of for m jtae res rttcd t. hat could be apptied to predict the assembly strength of threaded components with ihe ISO 68 basic thread p rofi t e. These findings were thoroughly discussed within Sub-Committee SC I as wetl as in the various national committees.
Despite the initial retuctance of the committee to permit changes in existing specifications, the test prograrnme clearly indicated that there was inadequate resistance to assembly stripping, brought about Iargely by the improved tightening methods and upgrading of mechanicat properties. The problem was both one of boit thread stripping and nut thread stripping, and, as a result, it was conciuded ttIat the mosf viable means of overcoming the problern was by increasing .the nominal 0,811 nut height where required. It is not the purpose of this annex .to provide a detailed description of the tests conducted and the nut design method devetoped, for which the reader is referred to the foilowing pubiication which provides a summary of resuits and the nIcltIod employed: “Armlysis and Design of Threaded Assemblies”, E.M. Atexander, 1977 SAE Transactions, Paper No. 770420.
The caicuiation for nuts of proper-ty ciasses 4 to 6 according to ttIe Alexander theory was not based on tiIe maximum bolt hardness 250 HV, as given in ISO 898-1, see tabie A.l, because this is a tlardness which may occur at the boit end or ttIe head oniy. Therefore it was agreed to make caicuiations on the basis of the effective maximunI hardnesses within the thread engagement part of the holt, which are
given in table A.2.
Simiiar graduated hardness vaiues were specified in ISO/R 898-1:1968.
The above work showed that many factors influenced resistance of the stripping of threads, inciuding
folerances, pitch, beit mouthing of nut minor dianIeter, size of countersink in nut, relative strengfh of nut threads to bolt threads, tength of engagemenf, width across fiats of nut, and styie (for exampte hexagon flange), coefficient of friction, number of ttIreads in the grip, etc. Analysis of the various sizes of fasteners on this basis indicated .that it was not appropriate to have a fixed nominal nut height, for exampte 0,811 as before, but rather each Standard assembiy shouid be designed to give a suitable resistance to stripping. The resuit of this anaiysis gives the nut heights shown in table A-3.
It will be Seen that .there are two stytes of nut, styie 2 being approximateiy 10 % highet- than styie 1. Styie 1 height is intended for property ciasses 4, 5, 6, 8, 10 and 12 (up to M16) in conjunction with appropriate mechanical propel-ties, while style 2 dimensions are intended for use with property ciasses 8, 9 and 12, also with appropriate mechanicat properties. The higher style of nut was primarily developed as an economical cold-formed nut to be used with property class 9.8 boits and screws and it also provides suitabte dimensions for a heat-treatabte nut of good ductility for use with property class 12.9 botts and screws. The intended applications of the two styles of nuts at-e detaiied in table 5, from which it is seen that this additional style of nut does not mean that dual stocking of part geometry will result.
An overlapping between style 1 and style 2 occurs only in two cases. In the case of style 1, property class 8 allows the employment of nuts, not quenched and tempered (cold-worked low-carbon steel) only up to and including M?6; above M16 the nut style 1 has to be quenched and tempered. However, it is possible in this case to use alternatively the thicker. not quenched and tempered, style 2. This is a question of economics in the final analysis. In the case of property class 12, it is not appropriate to use style 1 nuts above size M16. Due to the required proof foads, it would be necessary to raise the hardness of the nut to such an extent that its ductility, which is necessary from the functional Point of view, would be impaired. Hence, the thicker style 2 nuts quenched and tempered are necessary in this case. If necessary, it would be possible to restritt the use of these nuts to sizes above M16, so that then no overlapping between style 1 and style 2 would occur in the case of property class 12.
Once nut dimensions were determined based on assembly strength criteria, the proof loads of these nuts with a restricted size hardened rnandrel were determined. The t-esult was that Stresses under proof load were not constant for each property class of nut brit varied with size. Accordingly, table 5 Shows revised Stresses under proof load and hardness values for nuts. The property classes 04 and 05 (previousiy 06) for hexagon lhin nuts with resultant reduced loadability are also indicated in this table. These nuts incidentally were not designed to provide resistance to stripping and are simply based on a fixed height of 0,61).The stresses under proof load given in table 5 are for the Standard tolerante of 6H usually applied to nuts for mechanical fasteners. Where a Iarger tolerante or allowance is applied, these Stresses should be modified by a factor as shown in table 1.

The loads given in table 1 at-e based on a test mandrel as specified in this part of ISO 898 with a minimum hardness of 45 HRC and thread tolerante of 5h6g (major diameter of 6g in the last quarter).
ISO 898-1 and this part of ISO 898 on mechanical properties, ISO 4014 to ISO 4018 on hexagon bolts
and screws, and ISO 4032 to ISO 4036 on hexagonal nuts have been published reflecting the revised mechanical properties, changes in nut heights and changes in width across flats (width across flats of MIO, M12, M14 and M22 revised to 16 mm, 18 r-nm, 21 t-nm and 34 mm respectively fror-n 17 mm, 19 mm, 22 mm and 32 mm) as recommended by ISO/TC 2.
This part of ISO 898 makes the following Statement concerning the property classes for nuts with fullloadability:
A bolt or screw of a particuiat- propet-ty class assernbled with the equivalent pt-operty class of nut, in accordance with table 2, is intended to provide an assembly capable of being tiqhtened to achieve a bolt tension equivalent to ihe bolt proof Load or yield load without stripping. Additionally, geometry and mechanical proper-ties of nuts up to M39 and property class 12 of 6H thread tolerantes are designed to pt-ovide fot- a high deqree of t-c-tskpl,~ nee lo sirlpping (at least IO % b&t breakage of individual lots even under adverse minimum material conditions) when inadvertently overtorqued, in ot-der to warn the user- that the installation practice is not appropriate.
Certain users of the referenced Standards could not! of necessity, participate in their detailed development and it is hoped that this explanatory note will provide increased understanding of this reIatively complicated subject.
Table A.1 - Property classes for bolts and screws
Table A.2 - Effective maximum hardness within the thread engagement part of the bolt
Table A.3 - Heights of hexagon nuts
Annex B
(informative)
Bibliography
[l] ISO 3506:1979, Corrosion-resistan t s tainless steel fasteners -- Specifications.
[2] ISO 4014:1988, Hexagon head bolts – Product grades A and B.
[3] ISO 4015:1979, Hexagon head bolts ~ Product grade 8 -- Reduced hanh (slw?k diameler approximately egual to pitch diameter).
[4]ISO 4016:1988, Hexaqo.. n head bolts – Product grade C.
[5] ISO 4017:1988, Hexagon head screws – Product grades A and B.
[6] ISO 4018:1988, Hexagon head screws - Product grade C.
[7] ISO 40323986, Hexagon nuts, sfyle I – Product grades A and 8.
[8] ISO 4033:1979, Hexagon nuk, style 2 – Product grades A and B.
[9] ISO 40341986, Hexagorj nuts - Product grade C.
[1 0] ISO 4035:1986, Hexagon thin nuts (chamfered) -- Product gLr ades A and B.
[ 1 l] ISO 4036:1979, Hexagon thin nuts – Product grade B (urhamfered}.
Links:https://www.globefindpro.com/products/89707.html
