Forged Steel Grinding Balls
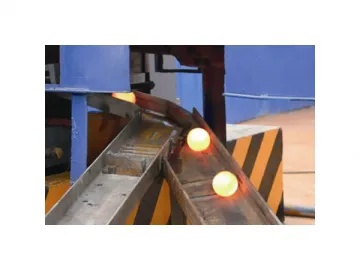
The forged steel grinding ball is excellent in surface quality, toughness, and resistance to impact and abrasion. It won't crack and lose circularity easily. The forging and stamping method that we use is that heating the metal until the temperature reaches 1050ºC (±50 ºC), and utilizing the metalforming machinery to exert pressure onto the metal blank, then the metal blank coming out with plastic deformation to become the forge piece with certain mechanical properties, shape and dimension.
The forging can eliminate the defects such as porous as-cast microstructure generated during the smelting process of the metal, and optimize the microstructure. Meanwhile, as a result of the preservation of the complete metal flow line, the forge piece has superior mechanical performance to the casting with the same material. The forged steel grinding ball must use the super wear resistant material to ensure the abrasion resistance, such as the high-carbon steel materials compliant with the national standard, or the high wear resistant alloy steel material researched and developed independently by some companies themselves.
We utilize the steel material manufactured by the national large steel mill. Even using the same material, different steel mills would produce the steel having different quality. The quality of the forge piece depends on the quality of the material by 80%. For example, the forge piece fabricated by using the high manganese steel has good toughness and resistance to impact and abrasion. It also won't crack easily. The forged steel grinding ball is favored by the majority of customers for low price, high economic durability, etc. Many large-scale related enterprises all utilize the product, such as the international mining giant of Rio Tinto, BHP Billiton, AngloGold Ashanti, etc.
Our product has precise size, high roundness, high hardness and mechanical properties. It is resistant to abrasion, and won't deform and crack. That can be fully shown from the aspects of high overall hardness, high surface hardness of up to 57HRC to 67HRC, high volume hardness as large as 56HRC to 64HRC, uniform hardness distribution, high impact toughness of greater than 12J/cm2, low breakage rate, peel fragmentation resistance property of over 20000 times, and the actual breakage rate not greater than 1% and close to 0.
We make a comparison of the consumption of the cast type and our forged rolled type steel grinding balls in a domestic iron ore plant with the result of 0.9kg/t and 0.6kg/t respectively. From the data, we can see that by using our product, the consumption for grinding every ton of ore is reduced by 33.3%.
Part I Steel Ball Product Quality Standard and Inspection Method
Rotary Cutting Steel Ball Production Process
Raw Material Inspection - Intermediate Frequency Furnace Heating - Steel Ball Formation via Rotary Cutting - Quenching Treatment - Tempering Treatment - Inspection - Packaging
Forged Steel Ball Production Process
Raw Material Inspection - Blanking - Intermediate Frequency Furnace Heating - Steel Ball Formation via Forging (Roll Forging) - Quenching Treatment - Tempering Treatment - Inspection - Packaging
Mechanical Property of Wear Resistant Product
| Diameter of steel ball (mm) | A-type material | B-type material | C-type material | D-type material | ||||||||
| SurfaceHar- dness HRC | Core Har- dness HRC | Impact Value | Surface Har- dness HRC | Core Har- dness HRC | Impact Value | Surface Har- dness HRC | Core Har- dness HRC | Impact Value | Surface Har- dness HRC | Core Har- dness HRC | Impact Value | |
| φ25 | 60-65 | 58-63 | ≥12J/CM2 | |||||||||
| φ30 | 60-65 | 55-60 | ≥12J/CM2 | |||||||||
| φ35 | 60-65 | 55-60 | ≥12J/CM2 | |||||||||
| φ40 | 60-65 | 55-63 | ≥12J/CM2 | 60-65 | 60-65 | ≥12J/CM2 | ||||||
| φ50 | 60-65 | 45-50 | ≥12J/CM2 | 60-65 | 60-65 | ≥12J/CM2 | ||||||
| φ60 | 60-65 | 42-47 | ≥12J/CM2 | 60-65 | 60-65 | ≥12J/CM2 | ||||||
| φ70 | 60-65 | 40-45 | ≥12J/CM2 | 60-65 | 60-65 | ≥12J/CM2 | ||||||
| φ75 | 60-65 | 40-45 | ≥12J/CM2 | 60-65 | 60-65 | ≥12J/CM2 | ||||||
| φ80 | 60-65 | 37-42 | ≥12J/CM2 | 60-65 | 60-65 | ≥12J/CM2 | ||||||
| φ90 | 60-65 | 37-42 | ≥12J/CM2 | 58-63 | 52-60 | ≥12J/CM2 | ||||||
| φ100 | 58-63 | 37-42 | ≥12J/CM2 | 53-58 | 42-58 | ≥12J/CM2 | 58-62 | 58-60 | ≥14J/CM2 | 60-65 | 60-65 | ≥14J/CM2 |
| φ110 | 55-63 | 35-40 | ≥12J/CM2 | 53-58 | 45-50 | ≥12J/CM2 | 58-62 | 58-60 | ≥14J/CM2 | 60-65 | 60-65 | ≥14J/CM2 |
| φ120 | 55-63 | 35-40 | ≥12J/CM2 | 53-58 | 45-50 | ≥12J/CM2 | 55-62 | 58-60 | ≥14J/CM2 | 60-65 | 60-65 | ≥14J/CM2 |
| φ125 | 50-55 | 35-40 | ≥12J/CM2 | 53-58 | 45-50 | ≥12J/CM2 | 55-62 | 52-58 | ≥14J/CM2 | 60-65 | 58-63 | ≥14J/CM2 |
| φ130 | 50-55 | 35-40 | ≥12J/CM2 | 53-58 | 40-45 | ≥12J/CM2 | 55-58 | 50-55 | ≥14J/CM2 | 60-65 | 58-63 | ≥14J/CM2 |
| φ140 | ≥12J/CM2 | 53-58 | 40-45 | ≥12J/CM2 | 55-58 | 45-55 | ≥14J/CM2 | 60-65 | 55-60 | ≥14J/CM2 | ||
| φ150 | ≥12J/CM2 | 53-58 | 40-45 | ≥12J/CM2 | 55-58 | 40-45 | ≥14J/CM2 | 60-65 | 53-58 | ≥14J/CM2 | ||
Note
1. The hardness is measured on the basis of ensuring no fragment of the steel ball. It can be enhanced further, or guaranteed with a certain level in accordance with the requirements of the customers.
2. The falling ball impact fatigue test is carried out by using the steel ball with the diameter of 100mm, on the testing machine with the standard height of 3.5m. The impact fatigue life of the 100mm steel ball is larger than 10000 times. The impact fatigue testing times of the steel balls with other models can be calculated according to the following formula.
N=10000×100/D
N - The fatigue testing times of the tested steel ball.
D - The diameter of the tested steel ball.
Part II Provision of Forged Steel Ball Product Quality Inspection and Test Method
A. Provision for Quality Inspection
1. The forged steel grinding ball for ball mill cannot have the defects visible to the naked eyes such as the crack, inclusion, overburning and serious fold on the surface. It can also not come out with rupturing or a cavity in the middle. If the weight of the products having the overburning phenomenon account for 5% of the total weight, the working staff should report to the related leader timely.
2. The surface of the steel ball is allowed to have local misrun, pockmark, and pit. For the roll forged steel ball, the depth of the defect cannot exceed 3mm. For the forged steel ball, it cannot be greater than the allowable tolerance dimension of the diameter. And the length of the defect cannot surpass 30% of the diameter of the steel ball.
3. The surface of the decorative steel ball is not allowed to have crack, inclusion, overburning, fold, pockmark, pit or protrusion.
4. Dimensional Tolerance
| Nominal Diameter (mm) | Dimensional Tolerance (mm) | Roundness (%) | Remark |
| Wear Resistant Steel Ball | |||
| φ20 | ±2 | ≤6 | 1. The diameter difference in size is the difference between the maximum (minimum) diameter and the nominal diameter.2. The roundness is the ratio of the difference between the maximum diameter and the minimum diameter to the nominal diameter. |
| φ25 | ±2 | ≤6 | |
| φ30 | ±2 | ≤5 | |
| φ35 | ±2 | ≤5 | |
| φ40 | ±2 | ≤5 | |
| φ50 | 3, -1 | ≤4 | |
| φ60 | 3, -1 | ≤4 | |
| φ70 | 3, -1 | ≤4 | |
| φ75 | 3, -1 | ≤4 | |
| φ80 | 3, -1 | ≤4 | |
| φ90 | 4, -2 | ≤4 | |
| φ100 | 4, -2 | ≤4 | |
| φ110 | 4, -2 | ≤4 | |
| φ120 | 4, -2 | ≤4 | |
| φ125 | 4, -2 | ≤4 | |
| φ130 | 4, -2 | ≤4 | |
| φ140 | 4, -2 | ≤4 | |
| φ150 | 4, -2 | ≤5 | |
B. Quality Test Method
1. Weigh the steel ball blank via the electronic scale. The blank is not allowed to have the oblique plane, inclusion and material slag that affect the quality of the forged steel grinding ball, or the pit with the depth exceeding 5mm. The blank with pointy protrusion and other shortages easily causing the defects should be processed.
2. The surface quality of the product is inspected with the naked eyes.
3. The dimension and the defects of the product should be measured by using the vernier caliper. It should be noted that the personnel should avoid the part with defect when measuring the product.
4. The surface hardness of the product is measured in accordance with the GB230-2004 Metallic Rockwell Hardness Test Method. Measure the hardness of four points on each product, and calculate the arithmetic mean value to get the hardness value.
C. Check and Acceptance
1. The quality inspection of the forged steel grinding ball is implemented by each workshop. The quality inspection department carries out the casual inspection. The customer also has the right to check the quality of the product.
2. The quality and the dimension of the products manufactured by each work shift should be strictly inspected in accordance with the above standard. The product can be stored into the warehouse only after it is inspected to be qualified.
3. Check the hardness by choosing five products from all the products manufactured by one work shift. If there is an unqualified one, then randomly choose the products with the amount doubled for re-inspection. If there is still an unqualified one, and the average value of all the hardness values conforms to the rule of the hardness requirement, then, this batch of forged steel grinding balls are qualified. Otherwise, they are unqualified.
4. The core hardness and the impact value are not the necessary checking items during the normal production inspection. Only when the customer has the request can we carry out the inspection to those two items.
Production Equipment
Related Names
Hardened Steel Balls | Solid Grinding Beads | Precision Metal Ball
Links:https://globefindpro.com/products/81482.html
-
 Y81-1350 Hydraulic Metal Baler
-
 PE Transparent Protection Film
-
 Carbon Steel Pipe Cap
-
 Patented Automatic Steel Grinding Ball Production Line
-
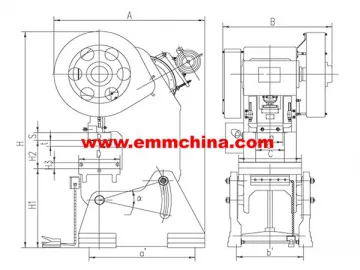 EMH23 Series C-frame High Performance Inclinable Presses
-
 Carbon Steel 45 Degree Short Radius Elbow
-
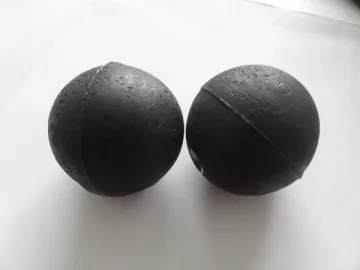 Cast Iron Grinding Balls
-
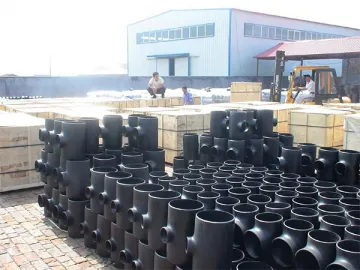 Carbon Steel Reducing Tee
-
 Laminated Paper Bag
-
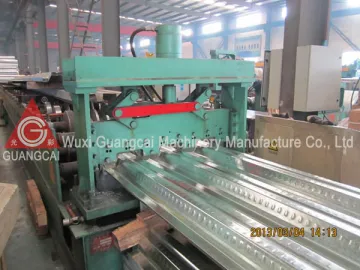 GWC76-305-915 Floor Deck Roll Forming Machine
-
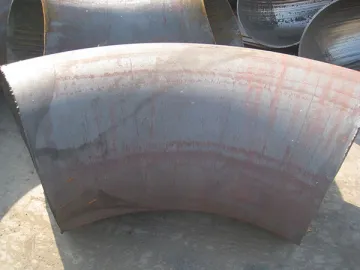 Carbon Steel 90 Degree Short Radius Elbow
-
 5 Axis Machining Center
